r, 5
1:50:35
Lab Sims
Chapter
PMChapter
NET5126.pdf!*^@&(@**&^@*(*^&*&*(@*&(&*YI#)*IY(&*(#(Y*)@(_@#&&#(*O_P{L|}?Q":OP!W#@10/29/2026,
Lab
5 Lab
SimsSims
NETNET
126.pdf!*^@&(@**&^@*(*^&*&*(@*&(&*YI#)*IY(&*(#(Y*)@(_@#&&#(*O_P{L|}?Q":OP!W#@10/29/2026,
126.pdf!*^@&(@**&^@*(*^&*&*(@*&(&*YI#)*IY(&*(#(Y*)@(_@#&&#(*O_P{L|}?Q":OP!W#@10/29/2026,
1:43:28 PMChapter
1:43:28
5
1:43:28
Lab
PMChapter
Sims
PMChapter
NET5126
Lab
5 Lab
SimsSim
N
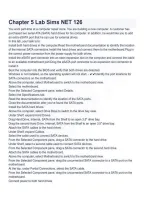
Chapter 5 Lab Sims NET 126
You work part-time at a computer repair store. You are building a new computer. A customer has
purchased two serial ATA (SATA) hard drives for his computer. In addition, he would like you to add
%
an extra eSATA port that he can use for external drives.
In this lab, your task is to:
Install both hard drives in the computer.Read the motherboard documentation to identify the location
of the internal SATA connectors.Install the hard drives and connect them to the motherboard.Plug in
the correct power connector from the power supply for both drives.
0
Install the eSATA port connector into an open expansion slot on the computer and connect the cable
to an available motherboard port.Drag the eSATA port connector to an expansion slot connector to
install it.
Boot the computer into the BIOS and verify that both drives are detected.
Windows is not installed, so the operating system will not start. - ✔✔Identify the port locations for
SATA connectors on the motherboard.
0
Above the computer, select Motherboard to switch to the motherboard view.
Select the motherboard.
From the Selected Component pane, select Details.
Select the Specifications tab.
1
Read the documentation to identify the location of the SATA ports.
Close the documentation after you've found the SATA ports.
Install the SATA hard drives.
Above the computer, select Drive Bays to switch to the drive bay view.
Under Shelf, expand Hard Drives.
Drag Hard Drive, Internal, SATA from the Shelf to an open 3.5" drive bay.
Drag the second Hard Drive, Internal, SATA from the Shelf to an open 3.5" drive bay.
Attach the SATA cables to the hard drives.
Under Shelf, expand Cables.
Select the cable used to connect SATA devices.
From the Selected Component pane, drag a SATA connector to the hard drive.
Under Shelf, select a second cable used to connect SATA devices.
From the Selected Component pane, drag a SATA connector to the second hard drive.
Attach the SATA cables to the motherboard.
Above the computer, select Motherboard to switch to the motherboard view.
From the Selected Component pane, drag the unconnected SATA connector to a SATA port on the
motherboard.
At the top, under Partial Connections, select the SATA cable.
From the Selected Component pane, drag the unconnected SATA connector to a SATA port on the
motherboard.
Connect power to both hard drives.
r Chapter
5 Lab Sims
Chapter
5 Lab
NETSims
5126.pdf!*^@&(@**&^@*(*^&*&*(@*&(&*YI#)*IY(&*(#(Y*)@(_@#&&#(*O_P{L|}?Q":OP!W#@10/29/2026,
Lab
NETSims
126.pdf!*^@&(@**&^@*(*^&*&*(@*&(&*YI#)*IY(&*(#(Y*)@(_@#&&#(*O_P{L|}?Q":OP!W#@10/29/2026,
NET 126.pdf!*^@&(@**&^@*(*^&*&*(@*&(&*YI#)*IY(&*(#(Y*)@(_@#&&#(*O_P{L|}?Q":OP!W#@10/29/2026,
1:43:28 PMChapter
1:43:28 PMChapter
1:43:28
5 LabPMChapter
Sims
5 Lab
NETSims
5126
Lab
NETSims
126N
,r, 5
1:50:35
Lab Sims
Chapter
PMChapter
NET5126.pdf!*^@&(@**&^@*(*^&*&*(@*&(&*YI#)*IY(&*(#(Y*)@(_@#&&#(*O_P{L|}?Q":OP!W#@10/29/2026,
Lab
5 Lab
SimsSims
NETNET
126.pdf!*^@&(@**&^@*(*^&*&*(@*&(&*YI#)*IY(&*(#(Y*)@(_@#&&#(*O_P{L|}?Q":OP!W#@10/29/2026,
126.pdf!*^@&(@**&^@*(*^&*&*(@*&(&*YI#)*IY(&*(#(Y*)@(_@#&&#(*O_P{L|}?Q":OP!W#@10/29/2026,
1:43:28 PMChapter
1:43:28
5
1:43:28
Lab
PMChapter
Sims
PMChapter
NET5126
Lab
5 Lab
SimsSim
N
Above the computer, select Drive Bays to switch to the drive bay view.
At the top, under Partial Connections, select the power supply.
From the Selected Component pane: Drag a SATA power connector to one of the hard drives.
Drag a SATA power connector to the second hard drive.
%
Install the eSATA port connector.
Above the computer, select Motherboard to switch to the motherboard view.
Under Shelf, expand Port Connector
You work at a computer repair store. You are building a new computer that will be used for video
0
editing and picture storage. You have installed the operating system on Disk 0 and then installed four
SATA hard drives. Now you want to add the following additional volumes:
The Editing volume (drive letter E:), which will be used to store raw video files for editing. This volume
needs to be optimized for performance.
The Media volume (drive letter M:), which will be used to store digital photos and completed video
files. This volume needs to provide fault tolerance so that a failure on one drive will not affect the
0
availability of the files.
In this lab, your task is to:
Initialize all the new disks using the GPT partition style.
Create the Editing volume (E:) as a striped volume (RAID0) using all of the space on Disk 1 and Disk
1
2.
Create the Media volume (M:) as a mirrored volume (RAID1) using all of the space on Disk -
✔✔Initialize the new disks using the GPT partition style. Select the power button to turn the
computer on. Right-click Start and select Disk Management. Select GPT as the partition style. Select
OK to initialize all disks. Maximize the window for better viewing.
Create a striped volume. Right-click Disk 1 and select New Striped Volume. Select Next. Under
Available, select Disk 2; then select Add. What will be the total capacity of the new volume? Select
Next. Use the Assign the following drive letter drop-down list to select E. Select Next. Make sure
NTFS is selected as the file system. Use Editing as the Volume label. Select Next. Select Finish.
Select Yes to convert the disks to dynamic disks.
Create a mirrored volume. Right-click Disk 3 and select New Mirrored Volume. Select Next. Under
Available, select Disk 4; then select Add. What will be the total capacity of the new volume? Select
Next. Use the Assign the following drive letter drop-down list to select M. Select Next. Make sure
NTFS is selected as the file system. Use Media as the Volume label; then select Next. Select Finish.
Select Yes to convert the disks to dynamic disks.
You work part-time at a computer repair store. You are in the process of configuring a new system.
You would like to install the operating system on a RAID5 array that provides both fault tolerance and
improved performance.
A RAID0 array only increases performance, while a RAID1 array only provides fault tolerance.
In this lab, your task is to:
r Chapter
5 Lab Sims
Chapter
5 Lab
NETSims
5126.pdf!*^@&(@**&^@*(*^&*&*(@*&(&*YI#)*IY(&*(#(Y*)@(_@#&&#(*O_P{L|}?Q":OP!W#@10/29/2026,
Lab
NETSims
126.pdf!*^@&(@**&^@*(*^&*&*(@*&(&*YI#)*IY(&*(#(Y*)@(_@#&&#(*O_P{L|}?Q":OP!W#@10/29/2026,
NET 126.pdf!*^@&(@**&^@*(*^&*&*(@*&(&*YI#)*IY(&*(#(Y*)@(_@#&&#(*O_P{L|}?Q":OP!W#@10/29/2026,
1:43:28 PMChapter
1:43:28 PMChapter
1:43:28
5 LabPMChapter
Sims
5 Lab
NETSims
5126
Lab
NETSims
126N
1:50:35
Lab Sims
Chapter
PMChapter
NET5126.pdf!*^@&(@**&^@*(*^&*&*(@*&(&*YI#)*IY(&*(#(Y*)@(_@#&&#(*O_P{L|}?Q":OP!W#@10/29/2026,
Lab
5 Lab
SimsSims
NETNET
126.pdf!*^@&(@**&^@*(*^&*&*(@*&(&*YI#)*IY(&*(#(Y*)@(_@#&&#(*O_P{L|}?Q":OP!W#@10/29/2026,
126.pdf!*^@&(@**&^@*(*^&*&*(@*&(&*YI#)*IY(&*(#(Y*)@(_@#&&#(*O_P{L|}?Q":OP!W#@10/29/2026,
1:43:28 PMChapter
1:43:28
5
1:43:28
Lab
PMChapter
Sims
PMChapter
NET5126
Lab
5 Lab
SimsSim
N
Chapter 5 Lab Sims NET 126
You work part-time at a computer repair store. You are building a new computer. A customer has
purchased two serial ATA (SATA) hard drives for his computer. In addition, he would like you to add
%
an extra eSATA port that he can use for external drives.
In this lab, your task is to:
Install both hard drives in the computer.Read the motherboard documentation to identify the location
of the internal SATA connectors.Install the hard drives and connect them to the motherboard.Plug in
the correct power connector from the power supply for both drives.
0
Install the eSATA port connector into an open expansion slot on the computer and connect the cable
to an available motherboard port.Drag the eSATA port connector to an expansion slot connector to
install it.
Boot the computer into the BIOS and verify that both drives are detected.
Windows is not installed, so the operating system will not start. - ✔✔Identify the port locations for
SATA connectors on the motherboard.
0
Above the computer, select Motherboard to switch to the motherboard view.
Select the motherboard.
From the Selected Component pane, select Details.
Select the Specifications tab.
1
Read the documentation to identify the location of the SATA ports.
Close the documentation after you've found the SATA ports.
Install the SATA hard drives.
Above the computer, select Drive Bays to switch to the drive bay view.
Under Shelf, expand Hard Drives.
Drag Hard Drive, Internal, SATA from the Shelf to an open 3.5" drive bay.
Drag the second Hard Drive, Internal, SATA from the Shelf to an open 3.5" drive bay.
Attach the SATA cables to the hard drives.
Under Shelf, expand Cables.
Select the cable used to connect SATA devices.
From the Selected Component pane, drag a SATA connector to the hard drive.
Under Shelf, select a second cable used to connect SATA devices.
From the Selected Component pane, drag a SATA connector to the second hard drive.
Attach the SATA cables to the motherboard.
Above the computer, select Motherboard to switch to the motherboard view.
From the Selected Component pane, drag the unconnected SATA connector to a SATA port on the
motherboard.
At the top, under Partial Connections, select the SATA cable.
From the Selected Component pane, drag the unconnected SATA connector to a SATA port on the
motherboard.
Connect power to both hard drives.
r Chapter
5 Lab Sims
Chapter
5 Lab
NETSims
5126.pdf!*^@&(@**&^@*(*^&*&*(@*&(&*YI#)*IY(&*(#(Y*)@(_@#&&#(*O_P{L|}?Q":OP!W#@10/29/2026,
Lab
NETSims
126.pdf!*^@&(@**&^@*(*^&*&*(@*&(&*YI#)*IY(&*(#(Y*)@(_@#&&#(*O_P{L|}?Q":OP!W#@10/29/2026,
NET 126.pdf!*^@&(@**&^@*(*^&*&*(@*&(&*YI#)*IY(&*(#(Y*)@(_@#&&#(*O_P{L|}?Q":OP!W#@10/29/2026,
1:43:28 PMChapter
1:43:28 PMChapter
1:43:28
5 LabPMChapter
Sims
5 Lab
NETSims
5126
Lab
NETSims
126N
,r, 5
1:50:35
Lab Sims
Chapter
PMChapter
NET5126.pdf!*^@&(@**&^@*(*^&*&*(@*&(&*YI#)*IY(&*(#(Y*)@(_@#&&#(*O_P{L|}?Q":OP!W#@10/29/2026,
Lab
5 Lab
SimsSims
NETNET
126.pdf!*^@&(@**&^@*(*^&*&*(@*&(&*YI#)*IY(&*(#(Y*)@(_@#&&#(*O_P{L|}?Q":OP!W#@10/29/2026,
126.pdf!*^@&(@**&^@*(*^&*&*(@*&(&*YI#)*IY(&*(#(Y*)@(_@#&&#(*O_P{L|}?Q":OP!W#@10/29/2026,
1:43:28 PMChapter
1:43:28
5
1:43:28
Lab
PMChapter
Sims
PMChapter
NET5126
Lab
5 Lab
SimsSim
N
Above the computer, select Drive Bays to switch to the drive bay view.
At the top, under Partial Connections, select the power supply.
From the Selected Component pane: Drag a SATA power connector to one of the hard drives.
Drag a SATA power connector to the second hard drive.
%
Install the eSATA port connector.
Above the computer, select Motherboard to switch to the motherboard view.
Under Shelf, expand Port Connector
You work at a computer repair store. You are building a new computer that will be used for video
0
editing and picture storage. You have installed the operating system on Disk 0 and then installed four
SATA hard drives. Now you want to add the following additional volumes:
The Editing volume (drive letter E:), which will be used to store raw video files for editing. This volume
needs to be optimized for performance.
The Media volume (drive letter M:), which will be used to store digital photos and completed video
files. This volume needs to provide fault tolerance so that a failure on one drive will not affect the
0
availability of the files.
In this lab, your task is to:
Initialize all the new disks using the GPT partition style.
Create the Editing volume (E:) as a striped volume (RAID0) using all of the space on Disk 1 and Disk
1
2.
Create the Media volume (M:) as a mirrored volume (RAID1) using all of the space on Disk -
✔✔Initialize the new disks using the GPT partition style. Select the power button to turn the
computer on. Right-click Start and select Disk Management. Select GPT as the partition style. Select
OK to initialize all disks. Maximize the window for better viewing.
Create a striped volume. Right-click Disk 1 and select New Striped Volume. Select Next. Under
Available, select Disk 2; then select Add. What will be the total capacity of the new volume? Select
Next. Use the Assign the following drive letter drop-down list to select E. Select Next. Make sure
NTFS is selected as the file system. Use Editing as the Volume label. Select Next. Select Finish.
Select Yes to convert the disks to dynamic disks.
Create a mirrored volume. Right-click Disk 3 and select New Mirrored Volume. Select Next. Under
Available, select Disk 4; then select Add. What will be the total capacity of the new volume? Select
Next. Use the Assign the following drive letter drop-down list to select M. Select Next. Make sure
NTFS is selected as the file system. Use Media as the Volume label; then select Next. Select Finish.
Select Yes to convert the disks to dynamic disks.
You work part-time at a computer repair store. You are in the process of configuring a new system.
You would like to install the operating system on a RAID5 array that provides both fault tolerance and
improved performance.
A RAID0 array only increases performance, while a RAID1 array only provides fault tolerance.
In this lab, your task is to:
r Chapter
5 Lab Sims
Chapter
5 Lab
NETSims
5126.pdf!*^@&(@**&^@*(*^&*&*(@*&(&*YI#)*IY(&*(#(Y*)@(_@#&&#(*O_P{L|}?Q":OP!W#@10/29/2026,
Lab
NETSims
126.pdf!*^@&(@**&^@*(*^&*&*(@*&(&*YI#)*IY(&*(#(Y*)@(_@#&&#(*O_P{L|}?Q":OP!W#@10/29/2026,
NET 126.pdf!*^@&(@**&^@*(*^&*&*(@*&(&*YI#)*IY(&*(#(Y*)@(_@#&&#(*O_P{L|}?Q":OP!W#@10/29/2026,
1:43:28 PMChapter
1:43:28 PMChapter
1:43:28
5 LabPMChapter
Sims
5 Lab
NETSims
5126
Lab
NETSims
126N