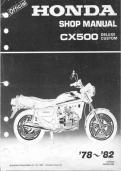
, HOW TO USE THlS MANUAL
This shop manual covers emission controlled
CX500's manufactured after December 31,
1977. Some procedures may not apply to earlier
units.
This shop manual uses the 1978 CX500 as the
basis for all service procedures and data. The
manual is kept up-to-date with subsequent ad-
dendum~beginning with section 21.
Follow the applicable Maintenance Schedule re-
commendations to ensure that the vehicle is
in peak opera.fing condition and the emission
levels are within U.S. Environmental Protection
Agency standards. Performing the first sched-
uled maintenance is very important. I t compen-
sates for the initial wear that occurs during
break-in.
Sections 1 through 3 apply to the whole
motorcycle, while sections 4 through 18
describe parts of the motorcycle, grouped
according to location.
Find the section you want on this page, then
turn to the table of contents on page 1 of that
section.
Most sections Start with an assembly or system
illustration and all the required specifications,
torque valuk, working practices, tools and
materials required for the section. The sub.
sequent pages give detailed procedures for the :BRAKE
section.
If you are not familiar with this motorcycle,
read through the TECHNICAL FEATURES in
section 19.
If you don't know the source of the trouble, go
to section 20 TROUBLESHOOTING.
ALL INFORMATION, ILLUSTRATIONS, DIREC.
TlONS AND SPECIFICATIONS INCLUDED IN
THlS PUBLICATION ARE BASED ON THE
LATEST PRODUCT INFORMATION AVAILABLE
AT THE TlME OF APPROVAL FOR PRINTING.
HONDA MOTOR CO., LTD. RESERVES THE
RIGHT TO MAKE CHANGES AT ANY TlME
WITHOUT NOTICE AND WITHOUT INCURRING
ANY OBLIGATION WHATEVER.
NO PART OF THlS PUBLICATION MAY BE
REPRODUCED WITHOUT WRITTEN PERMIS-
SION.
HONDA MOTOR CO., LTD.
Service Publications Office
Date of Issue: September 1981
-
@American Honda Motor Co., Inc. 1981 All Rights Resewed
, HONDA
CX508
MODEL IDENTIFICATION
BEGINNING WITH FIN 2000001
The frame serial number is stamped on the right side of The legal vehicle identification number is on the left side
the steering head. of the steering head.
The engine serial number is stamped on the lower left The carburetor identification number is on the left side
side of the engine case. of the carburetor body.
-,,
IDENTIFICATION NUMBER
-7
3INE SERI
I IER
"
-,,
Date of Issue: August, 1979
OHONOA MOTOR CO., LTD.
81
, - GENERAL SAFETY 1-1 WIRING DIAGRAM 1-6
SERVICE RULES 1-1 CABLE & HARNESS ROUTING 1-7
SPECIFICATIONS 1-2 EMISSION CONTROL SYSTEM 1-8 1
TORQUE VALUES 1-4 EMISSION CONTROL INFORMATION
.- LABEL 1-9
SPECIAL TOOLSICOMMON TOOLS 1-5
MAINTENANCE SCHEDULE 1-10
GENERAL SAFETY
I/ I ~ engine
P must
he running to do some work, make 77112hulrery electrolyte contains sulfuric acid. Protect
sure the area is well-ventilated. Never run the engine your eyes, skin and clothing. In case of contact, flush
in a closed area. The exhaust contains poisonous thoroughly with water and call a doctor if your eyes
carbon monoxide gas. were exposed.
- mm r ~ ~ . .flammable and is explosive
( r ~ \ f ~ lis~ extremely I%(, boirery generates hydrogen gas which can be
under certain conditions. Do not smoke or allow highly explosive. Do not smoke or allow flomes or
flames or sparks in your working area. sparks near the battery, especially while chargingit.
SERVICE RULES
1. Use geniune HONDA or HONDA-recommended parts and lubricants or their equivalent. Parts that do not meet HONDA's
- design specifications may damage the motorcycle.
2. Use the special tools designed for this product.
3. Install new gaskets, O-rings, cotter pins, lock plates, etc. when reasserhbling.
4. When torquing bolts or nuts, begin with larger-diameter or inner bolt first, and tighten t o the specified torque diagonally,
unless a particular sequence is specified.
5. Clean'parts in cleaning solvent upon disassembly. Lubricate any sliding surfaces before reassembly.
- 6. After reassembly, check all parts for proper installation and operation.
7. Use only metric tools when servicing this motorcycle. Metric bolts, nuts, and screws are not interchangeable with English
fasteners. The use of incorrect tools and fasteners may damage the motorcycle.
Date of Issue: January. 1978
OHONDA MOTOR CO.. LTD
This shop manual covers emission controlled
CX500's manufactured after December 31,
1977. Some procedures may not apply to earlier
units.
This shop manual uses the 1978 CX500 as the
basis for all service procedures and data. The
manual is kept up-to-date with subsequent ad-
dendum~beginning with section 21.
Follow the applicable Maintenance Schedule re-
commendations to ensure that the vehicle is
in peak opera.fing condition and the emission
levels are within U.S. Environmental Protection
Agency standards. Performing the first sched-
uled maintenance is very important. I t compen-
sates for the initial wear that occurs during
break-in.
Sections 1 through 3 apply to the whole
motorcycle, while sections 4 through 18
describe parts of the motorcycle, grouped
according to location.
Find the section you want on this page, then
turn to the table of contents on page 1 of that
section.
Most sections Start with an assembly or system
illustration and all the required specifications,
torque valuk, working practices, tools and
materials required for the section. The sub.
sequent pages give detailed procedures for the :BRAKE
section.
If you are not familiar with this motorcycle,
read through the TECHNICAL FEATURES in
section 19.
If you don't know the source of the trouble, go
to section 20 TROUBLESHOOTING.
ALL INFORMATION, ILLUSTRATIONS, DIREC.
TlONS AND SPECIFICATIONS INCLUDED IN
THlS PUBLICATION ARE BASED ON THE
LATEST PRODUCT INFORMATION AVAILABLE
AT THE TlME OF APPROVAL FOR PRINTING.
HONDA MOTOR CO., LTD. RESERVES THE
RIGHT TO MAKE CHANGES AT ANY TlME
WITHOUT NOTICE AND WITHOUT INCURRING
ANY OBLIGATION WHATEVER.
NO PART OF THlS PUBLICATION MAY BE
REPRODUCED WITHOUT WRITTEN PERMIS-
SION.
HONDA MOTOR CO., LTD.
Service Publications Office
Date of Issue: September 1981
-
@American Honda Motor Co., Inc. 1981 All Rights Resewed
, HONDA
CX508
MODEL IDENTIFICATION
BEGINNING WITH FIN 2000001
The frame serial number is stamped on the right side of The legal vehicle identification number is on the left side
the steering head. of the steering head.
The engine serial number is stamped on the lower left The carburetor identification number is on the left side
side of the engine case. of the carburetor body.
-,,
IDENTIFICATION NUMBER
-7
3INE SERI
I IER
"
-,,
Date of Issue: August, 1979
OHONOA MOTOR CO., LTD.
81
, - GENERAL SAFETY 1-1 WIRING DIAGRAM 1-6
SERVICE RULES 1-1 CABLE & HARNESS ROUTING 1-7
SPECIFICATIONS 1-2 EMISSION CONTROL SYSTEM 1-8 1
TORQUE VALUES 1-4 EMISSION CONTROL INFORMATION
.- LABEL 1-9
SPECIAL TOOLSICOMMON TOOLS 1-5
MAINTENANCE SCHEDULE 1-10
GENERAL SAFETY
I/ I ~ engine
P must
he running to do some work, make 77112hulrery electrolyte contains sulfuric acid. Protect
sure the area is well-ventilated. Never run the engine your eyes, skin and clothing. In case of contact, flush
in a closed area. The exhaust contains poisonous thoroughly with water and call a doctor if your eyes
carbon monoxide gas. were exposed.
- mm r ~ ~ . .flammable and is explosive
( r ~ \ f ~ lis~ extremely I%(, boirery generates hydrogen gas which can be
under certain conditions. Do not smoke or allow highly explosive. Do not smoke or allow flomes or
flames or sparks in your working area. sparks near the battery, especially while chargingit.
SERVICE RULES
1. Use geniune HONDA or HONDA-recommended parts and lubricants or their equivalent. Parts that do not meet HONDA's
- design specifications may damage the motorcycle.
2. Use the special tools designed for this product.
3. Install new gaskets, O-rings, cotter pins, lock plates, etc. when reasserhbling.
4. When torquing bolts or nuts, begin with larger-diameter or inner bolt first, and tighten t o the specified torque diagonally,
unless a particular sequence is specified.
5. Clean'parts in cleaning solvent upon disassembly. Lubricate any sliding surfaces before reassembly.
- 6. After reassembly, check all parts for proper installation and operation.
7. Use only metric tools when servicing this motorcycle. Metric bolts, nuts, and screws are not interchangeable with English
fasteners. The use of incorrect tools and fasteners may damage the motorcycle.
Date of Issue: January. 1978
OHONDA MOTOR CO.. LTD