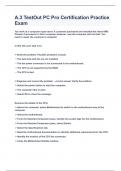
A.3 TestOut PC Pro Certification Practice Exam|2023 LATEST UPDATE|GUARANTEED SUCCESS
You work at a computer repair store. A customer purchased and installed the latest AMD Phenom II processor in their computer. However, now the computer will not start. You need to repair the customer's computer. In this lab, your task is to: Verify the problem. Possible problems include: ~ The heat sink and fan are not installed. ~ The fan power connector is not connected to the motherboard. ~ The CPU is not supported by the BIOS. ~ The CPU is bad. Diagnose and correct the problem. Verify the problem. Select the power button to start the computer. The computer fails to start. Select OK to close the message. Examine the details of the CPU. Above the computer, select Motherboard to switch to the motherboard view of the computer. Select the motherboard. From the Selected Component pane, identify the socket type for the motherboard. From the Selected Component pane, select Details. Select the Specifications tab. Read the motherboard documentation to identify additional requirements for the CPU. Identify the location of the CPU fan connector. Close the Motherboard Details window. Verify that all CPU power cables are connected. Select the Heat Sink and Fan. From the Selected Component pane, verify that the Connector, Fan, CPU 4-pin power connector is connected to the motherboard. Because everything is connected properly, you will need to replace the CPU. Install a new CPU. Drag the Heat Sink and Fan to the Workspace. Drag the CPU that's currently installed on the motherboard to the Shelf to remove it from the computer. From the Shelf, drag the new CPU, AMD AM3 to the CPU socket on the motherboard. From the Workspace, drag the Heat Sink and Fan to the motherboard. From the Selected Component pane, verify that the Connector, Fan, CPU 4-pin is still connected to the motherboard. Above the computer, select Front to switch to the front view of the computer. Select the power button to verify that the computer boots into Windows. You are one of the IT administrators for a corporate network. As you start each day, your job is to check the Issue Trax help desk system to see if any jobs have been submitted. You are working from the computer named ITAdmin. In this lab, your task is to: Open Issue Trax from ITAdmin. Find any tickets that need to be resolved. Resolve the issue using the information found in the open ticket. Add a comment to the ticket indicating that it has been resolved and close the ticket. From ITAdmin, determine the needs and possible fixes for Gerry's help desk ticket. From the taskbar, select Issue Trax. Maximize the window for better viewing. Select ticket #20 and determine the best course of action. Leave the ticket maximized so you can see the details. Identify the appropriate printer based on the scenario and move it to the Workspace. From the upper left, select Floor 1 Overview. Under Office 2, select Hardware. Under Shelf, expand Printers. For a printer, select Details and then select the Specifications tab. Read the description for the printer and then close the dialog. Repeat steps 2d - 2e for each remaining printer. Identify the printer that best meets the scenario's requirements. Drag the HP Photosmart Plus printer to the Workspace. Connect the printer to the computer. Above the computer, select Back to switch to the back view of the computer. Above the printer, select Back and examine the connection ports.Under Shelf, expand Cables. Select USB Cable (A/B). From the Selected Component pane: ~ Drag the USB Type B Connector to the port on the back of the printer. ~ Drag the USB Type A Connector to a USB port on the back of the computer. Provide power to the printer. Under Shelf, select Power Adapter for HP. From the Selected Component pane: ~ Drag the Power Adapter, DC connector to the port on the back of the printer. ~ Drag the Power Adapter, AC connector to an AC power port on the wall outlet or power strip. Verify the installation and set the printer as the default printer. On the monitor, select Click to view Windows 11. Right-click Start and then select Settings. Select Bluetooth & devices. From the right pane, select Printers & scanners. Your newly installed printer is shown. Under Printer preferences, for Let Windows manage my default printer, slide the button to Off. Select HP Photosmart Plus. Select Set as default. Add a comment to the ticket and close the ticket. From the upper left, select Floor 1 Overview. Under IT Administration, select ITAdmin. In the New Comment field, for the open ticket, add a comment to indicate that the printer has been installed. Select the + (plus sign) to add the comment. From the top of the ticket: ~ Select Closed. ~ Select the left arrow. There are no more tickets to be processed. Close Issue Trax. You are the IT administrator for a small corporate network. The area around your office complex is under construction. The power company informed you that there may be short interruptions to the electrical service that could last up to 15 minutes. You need to add a UPS to the workstation and monitor in Office 1 so that work can be saved in the event of an outage. A UPS protects against over- and under-voltage conditions. The battery included with the UPS provides backup power in case the main power is lost. In this lab, your task is to: Add a UPS to your computer: Plug the UPS into the wall outlet and turn it on. Plug the computer and monitor power cables into the appropriate UPS outlets. Plug the printer in to the appropriate UPS outlets. Connect the network cables through the UPS to the computer. The cable from the wall connects to the IN port. Connect the USB cable to the UPS and the computer. Power on the monitor and then the computer. Unplug the UPS from the wall outlet. Do the computer and monitor still have power? Add a UPS to the Workspace, plug it in, and power it on. Under Shelf, expand Outlets. Drag the UPS to the Workspace. From the Selected Component pane, drag the power plug to a power outlet on the wall plate. Click the power button on the UPS to turn it on. Plug the computer and monitor in to the appropriate power outlets. Under Partial Connections for the computer, select the power cord. From the Selected Component pane, drag the AC Power Connector (Male) to a battery backup outlet on the top of the UPS. Under Partial Connections for the monitor, select the power cord. From the Selected Component pane, drag the AC Power Connector (Male) to a battery backup outlet on the top of the UPS. Plug the printer in to the appropriate power outlets. Select the printer in the Workspace. From the Selected Component pane, drag the AC Power Connector (Male) to a surge protected outlet on the bottom of the UPS. Printers typically require more power than can be supplied by the battery backup portion of a UPS. In addition, if the printer loses power, no work will be lost. Connect to the network through the UPS. Above the surge protector, select Side to switch to the side view of the UPS. Select the RJ45 Shielded Connector (Cat6a) cable connected to the network port on the wall plate. From the Selected Component pane, drag the RJ45 Shielded Connector from the wall plate to the Network OUT port on the UPS to add protection to the network connection. The OUT port connects to the computer. Under Shelf, expand Cables. Select the Cat6a Cable. From the Selected Component pane: ~ Drag an RJ45 Shielded Connector to the Network IN port on the UPS. ~ Drag the unconnected RJ45 Shielded Connector to the network port on the wall plate. Connect the USB cable to the UPS and the computer. Above the computer, select Back to switch to the back view of the computer. Under Shelf, select USB Cable (A/B). From the Selected Component pane: ~ Drag the USB Type B Connector to the USB port on the UPS. ~ Drag USB Type A Connector to an open USB port on the computer to allow the UPS to communicate with the computer. The USB cable allows the UPS to send signals to the computer to shut down when the battery is low. Verify that the computer and monitor have power: Above the computer, select Front to switch to the front view of the computer. Select the power button on the monitor to make sure the power is connected. Select the power button on the computer to make sure it powers up. From the top left, select Office 1. From the wall plate, drag the AC Power Connector (Male) to the Workspace. From the Office 1 monitor, select Click to view Windows 11. Because the computer is being powered by the UPS, the computer is still on. You are the IT administrator for a small corporate network. You need to configure additional security in the BIOS for the computer in Office 1. In this lab, your task is to: Restart the computer in the BIOS. ~ Press F2 while the computer is booting. Configure the following security settings: Add an admin password used to make changes to BIOS settings. ~ Password: t67xab1 Add a password that prevents hard disk access even when the hard disk is moved to another system. ~ Password: dog8b0b (0 is a zero) Enable the TPM. Enable chassis intrusion detection to show an alert during POST when an intrusion is detected. ~ Save your changes. Restart the computer to verify the changes you have made. At the bottom of the BIOS window, select Send Ctrl + Alt + Del to restart the computer if necessary. Set the admin password. From the taskbar, select Start. The Start window is shown. From the bottom right of the Start window, select the power icon. Select Restart. When you see the TestOut logo, press F2 (or Delete) to access the BIOS settings. From the left pane, expand Security. Select Admin Password to set the admin password. Type t67xab1 in the Enter new password field. Type t67xab1 in the Confirm new password field. Select OK. Set the hard disk password. From the left pane, under Security, select Internal HDD-1 Password to configure a hard drive password. Type dog8b0b in the Enter new password field. (0 is a zero.) Type dog8b0b In the Confirm new password field. (0 is a zero.) Select OK. Read the warning message on the screen and then select Yes. Enable TPM.From the left pane, under Security, select TPM Security.From the right pane, select TPM Security.Select Apply.Select Activate.Select Apply. Enable intrusion detection. From the left pane, under Security, select Chassis Intrusion. Select Enable. Select Apply. Select Exit to exit and save your changes. The system automatically reboots. Verify the changes made. Press F2 (or Delete) during the BIOS load to test the admin password. If you do not press the Delete key in time, select the Send Ctrl + Alt + Del button at the bottom of the screen. Enter t67xab1 when you are prompted for the administrative password. Select OK. Notice that the admin password was set correctly. Select Exit to exit the BIOS. Type dog8b0b when prompted for the hard drive password. (0 is a zero.) Press Enter. Note that the hard drive password was set correctly. The system loads the operating system.
Written for
- Institution
- A.3 TestOut PC Pro Certification
- Course
- A.3 TestOut PC Pro Certification
Document information
- Uploaded on
- June 18, 2023
- Number of pages
- 32
- Written in
- 2022/2023
- Type
- Exam (elaborations)
- Contains
- Questions & answers
Subjects
-
a3 testout pc pro certification practice exam|202

Also available in package deal