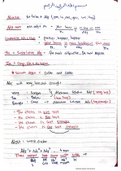
Hubspot Certification - Emails
Elements/capabilities of the Email Dashboard in Hubspot - correct answer-1.
Search for your email by name.
2. Create a new email.
3. Filter by campaign.
4. Filter by All rates, Click Rate, Open Rate to change what appears in your
graph.
5. Display All emails, Sent, Scheduled, Drafted, or Archived emails.
6. Quick access to more tools, including managing your Email Settings and
exporting a list of unsubscribed and bounced contacts.
7. Create new folders for email organization.
8. A quick look at Spam reports, unsubscribes, and unknown users within
recent email sends.
9. List of recent emails and their metrics.
Integration with other HubSpot tool - correct answer-Any Call-to-Action you
have in HubSpot can be inserted easily into your email, as well as any images
or documents you've uploaded to your File Manager. Along with the ability to
use your content in an email, you are able to utilize your HubSpot contact
database to send to targeted lists and personalize your content to a particular
contact.
Templates and Design - correct answer-Templates can be customized to fit
your design desires with an easy drag-and-drop interface. When creating a
template, you can add new modules, remove ones you don't want, and move
them where you want them to be. Additionally, HubSpot provides a template
marketplace where you can buy custom templates for your email.
Mobile optimization - correct answer-HubSpot's email tool has built-in email
testing tool. This feature allows you to see what your email will look like on
multiple devices and web clients before you send it. HubSpot's email
templates also have built-in responsiveness for mobile-friendliness.
List Segmentation and Personalization - correct answer-HubSpot's Email tool
works in tandem with your HubSpot contact database. When creating an email
you have the ability to personalize an email with a personalization token - this
token looks into the contact record of the person receiving the email and is
, able to pull that information from the contact record and place it into your
email.
Email Analytics - correct answer-Throughout the Email tool, there are places
to see how your email marketing campaign is performing, starting directly from
your Email Dashboard which is meant to display a view of the results of your
emails as a whole or by campaign to help you make future decisions without
having to go to Sources or Reporting to see this information. If you navigate to
All or Sent emails within your Email Dashboard, you can adjust the columns to
see more metrics from your Emails. Once you choose what you'd like to see in
your columns, you can see that view.
You can dig even deeper into individual email metrics. After you send an
email, HubSpot will show you the overall performance of that specific email
send. You can see the engagement rates of your email send, deliverability,
contacts lost, engagement over time, opens by device type, and clicks by
device type.
You can also filter your email analytic screen by Recipients. Here you will see
who the email was sent to, as well as other deliverability data. To learn more
about measuring your contacts' engagement with your emails, check out this
article.You can filter your recipients here by specific deliverability metrics by
clicking on the individual tabs for each. You can also create lists of these
contacts, export these contacts to an Excel file, or send this email to more
contacts.
How to set up your email footer information - correct answer-One of the first
steps to ensuring you're holding up your end of being CAN-SPAM compliant is
by setting your Email Footer Information with your postal address.
Steps to make your email CAN-SPAM compliant - correct answer-1. Navigate
to Content > Email.
2. Once in the Email tool, on the left-hand side, click on the link to Manage
Settings.
3. Once in your Email settings, you'll see on the left-hand side that you're
automatically taken to the Footer Information section.
4. Within the Email Footer Information area, you'll see multiple empty text box
fields. Very similarly to filling out a HubSpot form, you'll want to go through the
fields here and enter your information into as many fields as possible. Of
course, not all fields are required, but there are four that are: Company Name,
Address, City, and State. All required fields are marked with asterisks next to