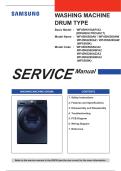
WASHING MACHINE
DRUM TYPE
Basic Model : WF45H6100AP/A2
(WF6000H PROJECT)
Model Name : WF45K6500AV / WF45K6500AW
WF45K6200AZ / WF45K6200AW
(WF6500K)
Model Code : WF45K6500AV/A2
WF45K6500AW/A2
WF45K6200AZ/A2
WF45K6200AW/A2
(WF6500K)
SERVICE Manual
WASHING MACHINE (DRUM) CONTENTS
1. Safety Instructions
2. Features and Specifications
3. Disassembly and Reassembly
4. Troubleshooting
5. PCB Diagram
6. Wiring Diagram
7. Reference
Refer to the service manual in the GSPN (see the rear cover) for the more information.
,Contents
1. Safety instructions. . . . . . . . . . . . . . . . . . . . . . . . . . . . . . . . . . . . . . . . . . . . . . . . . . . . . . . . . . . . . . . . . . . 1
1-1. Safety instructions for service engineers . . . . . . . . . . . . . . . . . . . . . . . . . . . . . . . . . . . . . . . . . . . . . . 1
2. Features and Specifications. . . . . . . . . . . . . . . . . . . . . . . . . . . . . . . . . . . . . . . . . . . . . . . . . . . . . . . . . . . 5
2-1. Features. . . . . . . . . . . . . . . . . . . . . . . . . . . . . . . . . . . . . . . . . . . . . . . . . . . . . . . . . . . . . . . . . . . . . . . . 5
2-2. Specifications. . . . . . . . . . . . . . . . . . . . . . . . . . . . . . . . . . . . . . . . . . . . . . . . . . . . . . . . . . . . . . . . . . . . 7
2-3. Comparing specifications with existing models. . . . . . . . . . . . . . . . . . . . . . . . . . . . . . . . . . . . . . . . . . 8
2-4. Options specifications . . . . . . . . . . . . . . . . . . . . . . . . . . . . . . . . . . . . . . . . . . . . . . . . . . . . . . . . . . . . . 9
3. Disassembly and Reassembly . . . . . . . . . . . . . . . . . . . . . . . . . . . . . . . . . . . . . . . . . . . . . . . . . . . . . . . . 10
3-1. Tools for disassembly and reassembly . . . . . . . . . . . . . . . . . . . . . . . . . . . . . . . . . . . . . . . . . . . . . . . 10
3-2. Standard disassembly drawings . . . . . . . . . . . . . . . . . . . . . . . . . . . . . . . . . . . . . . . . . . . . . . . . . . . . 11
4. Troubleshooting. . . . . . . . . . . . . . . . . . . . . . . . . . . . . . . . . . . . . . . . . . . . . . . . . . . . . . . . . . . . . . . . . . . . 25
4-1. Error modes. . . . . . . . . . . . . . . . . . . . . . . . . . . . . . . . . . . . . . . . . . . . . . . . . . . . . . . . . . . . . . . . . . . . 25
4-2. Corrective actions for each error code. . . . . . . . . . . . . . . . . . . . . . . . . . . . . . . . . . . . . . . . . . . . . . . . 29
5. PCB diagram. . . . . . . . . . . . . . . . . . . . . . . . . . . . . . . . . . . . . . . . . . . . . . . . . . . . . . . . . . . . . . . . . . . . . . . 35
5-1. MAIN PCB. . . . . . . . . . . . . . . . . . . . . . . . . . . . . . . . . . . . . . . . . . . . . . . . . . . . . . . . . . . . . . . . . . . . . 35
5-2. Circuit diagrams of main parts for main pcb. . . . . . . . . . . . . . . . . . . . . . . . . . . . . . . . . . . . . . . . . . . . 36
5-3 INVERTER PCB. . . . . . . . . . . . . . . . . . . . . . . . . . . . . . . . . . . . . . . . . . . . . . . . . . . . . . . . . . . . . . . . . 37
5.4. Circuit diagrams of main parts for INVERTER pcb . . . . . . . . . . . . . . . . . . . . . . . . . . . . . . . . . . . . . . 38
5-5. Sub PCB . . . . . . . . . . . . . . . . . . . . . . . . . . . . . . . . . . . . . . . . . . . . . . . . . . . . . . . . . . . . . . . . . . . . . . 39
5-6. Circuit diagrams of main parts for SUB pcb. . . . . . . . . . . . . . . . . . . . . . . . . . . . . . . . . . . . . . . . . . . . 40
6. Wiring diagram. . . . . . . . . . . . . . . . . . . . . . . . . . . . . . . . . . . . . . . . . . . . . . . . . . . . . . . . . . . . . . . . . . . . . 41
6-1. Wiring diagram. . . . . . . . . . . . . . . . . . . . . . . . . . . . . . . . . . . . . . . . . . . . . . . . . . . . . . . . . . . . . . . . . . 41
► This Document can not be used without Samsungs authorization.. . . . . . . . . . . . . . . . . . . . . . . . . . 41
7. Reference . . . . . . . . . . . . . . . . . . . . . . . . . . . . . . . . . . . . . . . . . . . . . . . . . . . . . . . . . . . . . . . . . . . . . . . . . 42
,1. Safety instructions
1-1. Safety instructions for service engineers
► Be sure to observe the following instructions to operate the product correctly and safely to prevent possible accidents
and hazards while servicing.
► Two types of safety symbols, Warning and Caution, are used in the safety instructions.
Hazards or unsafe practices that may result in severe personal injury or death.
WARNING
Hazards or unsafe practices that may result in minor personal injury or property damage.
CAUTION
WARNING BEFORE SERVICING
• (When servicing electrical parts or harnesses) Make sure to disconnect the power plug before servicing.
√ Failing to do so may result in a risk of electric shock.
• Do not allow consumers to connect several appliances to a single power outlet at the
same time.
√ There is a risk of fire due to overheating.
• When removing the power cord, make sure to hold the power plug when pulling the plug
from the outlet.
√ Failing to do so may damage the plug and result in fire or electric shock.
• When the washing machine is not being used, make sure to disconnect the power plug
from the power outlet.
√ Failing to do so may result in electric shock or fire due to lightning.
• Do not place or use gasoline, thinners, alcohol, or other flammable or explosive substances near the washing
machine.
√ There is a risk of explosion and fire caused from electric sparks.
Safety Instructions _ 1
, CAUTION BEFORE SERVICING
• Do not sprinkle water onto the washing machine directly when cleaning it.
√ This may result in electric shock or fire, and may shorten the product lifetime.
• Do not place any containers with water on the washing machine.
√ If the water is spilled, it may result in electric shock or fire. This will also shorten the
product lifetime.
• Do not install the washing machine in a location exposed to snow or rain.
√ This may result in electric shock or fire, and shorten the product lifetime.
• Do not press a control button using a sharp tool or object.
√ This may result in electric shock or damage to the product.
CAUTION WHILE SERVICING
• When wiring a harness, make sure to seal it completely so no liquid can enter.
√ Make sure that they do not break when force is exerted.
• Check if there is any residue that shows that liquid entered the electric parts or harnesses.
√ If any liquid has entered into a part, replace it or completely remove any remaining moisture from it.
• If you need to place the washing machine on its back for servicing purposes, place a support(s) on the floor and lay it
down carefully so its side is on the floor.
√ Do not lay it down on its front. This may result in the inside tub parts damaging.
2 _ Safety Instructions
DRUM TYPE
Basic Model : WF45H6100AP/A2
(WF6000H PROJECT)
Model Name : WF45K6500AV / WF45K6500AW
WF45K6200AZ / WF45K6200AW
(WF6500K)
Model Code : WF45K6500AV/A2
WF45K6500AW/A2
WF45K6200AZ/A2
WF45K6200AW/A2
(WF6500K)
SERVICE Manual
WASHING MACHINE (DRUM) CONTENTS
1. Safety Instructions
2. Features and Specifications
3. Disassembly and Reassembly
4. Troubleshooting
5. PCB Diagram
6. Wiring Diagram
7. Reference
Refer to the service manual in the GSPN (see the rear cover) for the more information.
,Contents
1. Safety instructions. . . . . . . . . . . . . . . . . . . . . . . . . . . . . . . . . . . . . . . . . . . . . . . . . . . . . . . . . . . . . . . . . . . 1
1-1. Safety instructions for service engineers . . . . . . . . . . . . . . . . . . . . . . . . . . . . . . . . . . . . . . . . . . . . . . 1
2. Features and Specifications. . . . . . . . . . . . . . . . . . . . . . . . . . . . . . . . . . . . . . . . . . . . . . . . . . . . . . . . . . . 5
2-1. Features. . . . . . . . . . . . . . . . . . . . . . . . . . . . . . . . . . . . . . . . . . . . . . . . . . . . . . . . . . . . . . . . . . . . . . . . 5
2-2. Specifications. . . . . . . . . . . . . . . . . . . . . . . . . . . . . . . . . . . . . . . . . . . . . . . . . . . . . . . . . . . . . . . . . . . . 7
2-3. Comparing specifications with existing models. . . . . . . . . . . . . . . . . . . . . . . . . . . . . . . . . . . . . . . . . . 8
2-4. Options specifications . . . . . . . . . . . . . . . . . . . . . . . . . . . . . . . . . . . . . . . . . . . . . . . . . . . . . . . . . . . . . 9
3. Disassembly and Reassembly . . . . . . . . . . . . . . . . . . . . . . . . . . . . . . . . . . . . . . . . . . . . . . . . . . . . . . . . 10
3-1. Tools for disassembly and reassembly . . . . . . . . . . . . . . . . . . . . . . . . . . . . . . . . . . . . . . . . . . . . . . . 10
3-2. Standard disassembly drawings . . . . . . . . . . . . . . . . . . . . . . . . . . . . . . . . . . . . . . . . . . . . . . . . . . . . 11
4. Troubleshooting. . . . . . . . . . . . . . . . . . . . . . . . . . . . . . . . . . . . . . . . . . . . . . . . . . . . . . . . . . . . . . . . . . . . 25
4-1. Error modes. . . . . . . . . . . . . . . . . . . . . . . . . . . . . . . . . . . . . . . . . . . . . . . . . . . . . . . . . . . . . . . . . . . . 25
4-2. Corrective actions for each error code. . . . . . . . . . . . . . . . . . . . . . . . . . . . . . . . . . . . . . . . . . . . . . . . 29
5. PCB diagram. . . . . . . . . . . . . . . . . . . . . . . . . . . . . . . . . . . . . . . . . . . . . . . . . . . . . . . . . . . . . . . . . . . . . . . 35
5-1. MAIN PCB. . . . . . . . . . . . . . . . . . . . . . . . . . . . . . . . . . . . . . . . . . . . . . . . . . . . . . . . . . . . . . . . . . . . . 35
5-2. Circuit diagrams of main parts for main pcb. . . . . . . . . . . . . . . . . . . . . . . . . . . . . . . . . . . . . . . . . . . . 36
5-3 INVERTER PCB. . . . . . . . . . . . . . . . . . . . . . . . . . . . . . . . . . . . . . . . . . . . . . . . . . . . . . . . . . . . . . . . . 37
5.4. Circuit diagrams of main parts for INVERTER pcb . . . . . . . . . . . . . . . . . . . . . . . . . . . . . . . . . . . . . . 38
5-5. Sub PCB . . . . . . . . . . . . . . . . . . . . . . . . . . . . . . . . . . . . . . . . . . . . . . . . . . . . . . . . . . . . . . . . . . . . . . 39
5-6. Circuit diagrams of main parts for SUB pcb. . . . . . . . . . . . . . . . . . . . . . . . . . . . . . . . . . . . . . . . . . . . 40
6. Wiring diagram. . . . . . . . . . . . . . . . . . . . . . . . . . . . . . . . . . . . . . . . . . . . . . . . . . . . . . . . . . . . . . . . . . . . . 41
6-1. Wiring diagram. . . . . . . . . . . . . . . . . . . . . . . . . . . . . . . . . . . . . . . . . . . . . . . . . . . . . . . . . . . . . . . . . . 41
► This Document can not be used without Samsungs authorization.. . . . . . . . . . . . . . . . . . . . . . . . . . 41
7. Reference . . . . . . . . . . . . . . . . . . . . . . . . . . . . . . . . . . . . . . . . . . . . . . . . . . . . . . . . . . . . . . . . . . . . . . . . . 42
,1. Safety instructions
1-1. Safety instructions for service engineers
► Be sure to observe the following instructions to operate the product correctly and safely to prevent possible accidents
and hazards while servicing.
► Two types of safety symbols, Warning and Caution, are used in the safety instructions.
Hazards or unsafe practices that may result in severe personal injury or death.
WARNING
Hazards or unsafe practices that may result in minor personal injury or property damage.
CAUTION
WARNING BEFORE SERVICING
• (When servicing electrical parts or harnesses) Make sure to disconnect the power plug before servicing.
√ Failing to do so may result in a risk of electric shock.
• Do not allow consumers to connect several appliances to a single power outlet at the
same time.
√ There is a risk of fire due to overheating.
• When removing the power cord, make sure to hold the power plug when pulling the plug
from the outlet.
√ Failing to do so may damage the plug and result in fire or electric shock.
• When the washing machine is not being used, make sure to disconnect the power plug
from the power outlet.
√ Failing to do so may result in electric shock or fire due to lightning.
• Do not place or use gasoline, thinners, alcohol, or other flammable or explosive substances near the washing
machine.
√ There is a risk of explosion and fire caused from electric sparks.
Safety Instructions _ 1
, CAUTION BEFORE SERVICING
• Do not sprinkle water onto the washing machine directly when cleaning it.
√ This may result in electric shock or fire, and may shorten the product lifetime.
• Do not place any containers with water on the washing machine.
√ If the water is spilled, it may result in electric shock or fire. This will also shorten the
product lifetime.
• Do not install the washing machine in a location exposed to snow or rain.
√ This may result in electric shock or fire, and shorten the product lifetime.
• Do not press a control button using a sharp tool or object.
√ This may result in electric shock or damage to the product.
CAUTION WHILE SERVICING
• When wiring a harness, make sure to seal it completely so no liquid can enter.
√ Make sure that they do not break when force is exerted.
• Check if there is any residue that shows that liquid entered the electric parts or harnesses.
√ If any liquid has entered into a part, replace it or completely remove any remaining moisture from it.
• If you need to place the washing machine on its back for servicing purposes, place a support(s) on the floor and lay it
down carefully so its side is on the floor.
√ Do not lay it down on its front. This may result in the inside tub parts damaging.
2 _ Safety Instructions