100% satisfaction guarantee Immediately available after payment Both online and in PDF No strings attached 4.2 TrustPilot
logo-home
Exam (elaborations)

ADDA Mechanical Drafter Certification Practice Exam Questions with Correct Answers 100% Solved

Rating
-
Sold
-
Pages
6
Grade
A+
Uploaded on
17-02-2025
Written in
2024/2025

ADDA Mechanical Drafter Certification Practice Exam Questions with Correct Answers 100% Solved false - Answers The top view of an object shows the height and depth dimensions. false - Answers If a part is finished all over, it must still have appropriate finish marks on all surfaces. false - Answers A depth auxiliary view is projected from the right-side view. false - Answers Parallel lines are never in the same plane. false - Answers The purpose of an auxiliary view is to show the foreshortened view of a surface. true - Answers There are 3600 seconds in a degree (angle measure). true - Answers There are 3 standard projection planes: frontal, horizontal, and profile. true - Answers In first angle projection, the object is between the viewer and projection plane. false - Answers An oblique plane is perpendicular to one of the of the primary planes. false - Answers The front view of an object should be chosen to maximize hidden lines. false - Answers Extension lines may not cross other extension lines. false - Answers The first line of dimensions is usually spaced 3/4" from the view. false - Answers Reference dimensions may be used for production purposes. true - Answers A trimetric pictorial has 3 different scales and axes. true - Answers In an isometric drawing, measurements are taken from the isometric axis at full scale. false - Answers In a cavalier oblique pictorial, the depth dimension is drawn half-scale. false - Answers A two-point perspective has one vanishing point and one station point. true - Answers An auxiliary view may be used to find the true length of a line. false - Answers If a surface is perpendicular to a primary plane but not parallel to any of the primary planes, a secondary auxiliary view must be constructed to find its true shape. true - Answers The reference plane/fold line must be constructed parallel to the edge view of a surface to construct the true size and shape of the surface. false - Answers Hidden lines are usually shown on pictorial drawings. false - Answers Finish marks are placed on the surface view of finished surfaces. true - Answers Rolled stock, plate, or sheet materials do not require finish marks. false - Answers An Engineering Change Notice (ECN) is not required if only the assembly process for components is being revised. true - Answers A coiled elastic body designed to store energy when deflected is a spring. true - Answers Symbols should precede sizes in dimensioning (i.e R.500, not .500 R). true - Answers The sum of the lengths of a triangle's 2 sides must be greater than the 3rd side's length. true - Answers There are 3 standard projection planes: frontal, horizontal, and profile. true - Answers Adding unlike fractions requires finding a common denominator. true - Answers If 2 sides of a triangle and the angle between them are known, the area can be found. true - Answers A rhombus is a rhomboid. false - Answers A Unified thread form has an included angle of 45°. true - Answers A parts list is also known as a bill of materials. false - Answers The quickest method for drawing screw threads is in schematic from. true - Answers The Acme thread form has a flat crest and a 29° included angle between threads. true - Answers The Whitworth thread form a rounded crest and a 55° included angle between threads.

Show more Read less
Institution
ADDA
Course
ADDA


Whoops! We can’t load your doc right now. Try again or contact support.

Written for

Institution
ADDA
Course
ADDA

Document information

Uploaded on
February 17, 2025
Number of pages
6
Written in
2024/2025
Type
Exam (elaborations)
Contains
Questions & answers

Subjects

Content preview

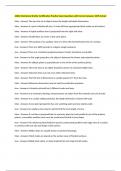
ADDA Mechanical Drafter Certification Practice Exam Questions with Correct Answers 100% Solved

false - Answers The top view of an object shows the height and depth dimensions.

false - Answers If a part is finished all over, it must still have appropriate finish marks on all surfaces.

false - Answers A depth auxiliary view is projected from the right-side view.

false - Answers Parallel lines are never in the same plane.

false - Answers The purpose of an auxiliary view is to show the foreshortened view of a surface.

true - Answers There are 3600 seconds in a degree (angle measure).

true - Answers There are 3 standard projection planes: frontal, horizontal, and profile.

true - Answers In first angle projection, the object is between the viewer and projection plane.

false - Answers An oblique plane is perpendicular to one of the of the primary planes.

false - Answers The front view of an object should be chosen to maximize hidden lines.

false - Answers Extension lines may not cross other extension lines.

false - Answers The first line of dimensions is usually spaced 3/4" from the view.

false - Answers Reference dimensions may be used for production purposes.

true - Answers A trimetric pictorial has 3 different scales and axes.

true - Answers In an isometric drawing, measurements are taken from the isometric axis at full scale.

false - Answers In a cavalier oblique pictorial, the depth dimension is drawn half-scale.

false - Answers A two-point perspective has one vanishing point and one station point.

true - Answers An auxiliary view may be used to find the true length of a line.

false - Answers If a surface is perpendicular to a primary plane but not parallel to any of the primary
planes, a secondary auxiliary view must be constructed to find its true shape.

true - Answers The reference plane/fold line must be constructed parallel to the edge view of a surface
to construct the true size and shape of the surface.

false - Answers Hidden lines are usually shown on pictorial drawings.

false - Answers Finish marks are placed on the surface view of finished surfaces.

true - Answers Rolled stock, plate, or sheet materials do not require finish marks.

, false - Answers An Engineering Change Notice (ECN) is not required if only the assembly process for
components is being revised.

true - Answers A coiled elastic body designed to store energy when deflected is a spring.

true - Answers Symbols should precede sizes in dimensioning (i.e R.500, not .500 R).

true - Answers The sum of the lengths of a triangle's 2 sides must be greater than the 3rd side's length.

true - Answers There are 3 standard projection planes: frontal, horizontal, and profile.

true - Answers Adding unlike fractions requires finding a common denominator.

true - Answers If 2 sides of a triangle and the angle between them are known, the area can be found.

true - Answers A rhombus is a rhomboid.

false - Answers A Unified thread form has an included angle of 45°.

true - Answers A parts list is also known as a bill of materials.

false - Answers The quickest method for drawing screw threads is in schematic from.

true - Answers The Acme thread form has a flat crest and a 29° included angle between threads.

true - Answers The Whitworth thread form a rounded crest and a 55° included angle between threads.

true - Answers True length lines are always parallel to the reference plane in all adjacent views.

false - Answers If the line of sight is parallel to a true length line, the line appears foreshortened in the
adjacent view.

false - Answers The true angle between 2 intersecting planes is the polyhedral angle.

true - Answers A spoke is not sectioned when cut parallel to its long axis, but is usually sectioned when
cut perpendicular to its long axis.

orthographic - Answers A multiview drawing is also known a(n) __________ drawing.

auxiliary - Answers A(n) __________ view is projected from an inclined surface.

section - Answers A(n) __________ view allows you to see the interior of an object.

removed - Answers A(n) __________ section is usually not aligned with a the primary view.

offset - Answers A(n) __________ section shows interior features not in a straight line by bending the
cutting plane line at 90° angles.

viewing plane line - Answers The __________ indicates the position of a removed view and line of sight.

Get to know the seller

Seller avatar
Reputation scores are based on the amount of documents a seller has sold for a fee and the reviews they have received for those documents. There are three levels: Bronze, Silver and Gold. The better the reputation, the more your can rely on the quality of the sellers work.
TutorJosh Chamberlain College Of Nursing
View profile
Follow You need to be logged in order to follow users or courses
Sold
347
Member since
1 year
Number of followers
16
Documents
28842
Last sold
1 day ago
Tutor Joshua

Here You will find all Documents and Package Deals Offered By Tutor Joshua.

3.6

55 reviews

5
19
4
14
3
12
2
0
1
10

Recently viewed by you

Why students choose Stuvia

Created by fellow students, verified by reviews

Quality you can trust: written by students who passed their tests and reviewed by others who've used these notes.

Didn't get what you expected? Choose another document

No worries! You can instantly pick a different document that better fits what you're looking for.

Pay as you like, start learning right away

No subscription, no commitments. Pay the way you're used to via credit card and download your PDF document instantly.

Student with book image

“Bought, downloaded, and aced it. It really can be that simple.”

Alisha Student

Frequently asked questions