Photography Page 1 of 18
Using Photoshop Elements 5.0 (An introduction)
Opening the application and files
Opening Photoshop
• Click on the Start button then select All apps/All Programs and click on
Adobe Photoshop Elements 5.0
• To edit pictures select Edit and Enhance Photos from the Photoshop start-up
welcome screen.
Opening a picture file
• Click on File on the menu bar then select and click on Open… Ctrl + O. Use
the Open screen to select the file you want to open by clicking to open the
folders it is in. Once found double click on the picture file to open it.
Digital editing workflow
Digital editing workflow is digital editing of a photograph to improve it. The order of
the steps is important since alterations made by one step should not be undone or
changed by a later step. Moving from general global alterations to more selective
specific changes is best.
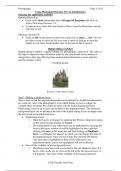
Unedited picture
STAGE 1: CREATING A COPY
Step1 - Making a duplicate layer.
This is done so that the original photograph can be returned to should the adjustments
not work out. Also if the photograph is to be edited further to form a collage for
example there are things that cannot be done with the locked background layer.
Duplicating it frees it up so more can be done to the duplicated layer. The unaltered
background layer can be deleted at the end of the digital editing if you are happy with
the final result in the duplicated layer.
• Duplicating a layer
o Open the Layers workspace by selecting the Windows drop down menu
on the menu bar and clicking on Layers.
o The background (or any other) layer can be duplicated by selecting the
layer in the layers window (it will be highlighted in blue) and then
clicking on Layer on the menu bar and then clicking on Duplicate
layer… A dialogue box appears in which you can change the name of
the duplicated layer. Once you have done that click the OK button.
Any layer that is highlighted in blue will be affected by any
adjustments made. Layers not highlighted will not be affected.
• Turn off the visibility of the background layer
o The Background layer will now be below the new duplicate layer. It is
best to click on the eye in a box on the left in the Background layer so
it disappears. This turns off the visibility of the background layer.
© Mr Timothy John Tyne
, Photography Page 2 of 18
Most steps from this point on can be done automatically or manually. Where this is
the case both methods will be given.
• Undoing actions
o Both the manual and automatic adjustments could be tried for each
step.
o Selecting Edit in the menu bar and clicking on Undo Ctrl+Z will
undo the last action or selecting Revert will undo all the actions going
back to when the file was last saved.
• Saving a file
o To Save a file after a step is completed select File in the menu bar and
click on Save Ctrl+S to overwrite the present file or click on
Save As… Shift+Ctrl+S to save the file as a new file.
Note If the file is saved as a JPEG the background layer will be lost in
the JPEG file and the edited duplicate layer becomes the new
background layer.
STAGE 2: STRAIGHTENING AND PERSPECTIVE ADJUSTMENTS
Step 2 – Straightening the picture
• Automatic method
o Select Image on the menu bar and from the drop-down menu chose
Rotate ►and across to Straighten and Crop Image.
o Use the Crop Tool to trim the image by clicking on it and the clicking
and holding while dragging it across the area of the image to be cut
out.
o If the selected area is not suitable use the handles around the dashed
rectangle to adjust the size and when happy click the green tick.
• Manual method
o Switch on the grid as a guide by selecting View and click on Grid if
there is no tick next to it so that a tick appears and the Grid appears on
the image.
o Select Image on the menu bar and from the drop-down menu chose
Rotate ►and across to Custom.
o In the Rotate Canvas dialogue box enter an Angle and chose Left or
Right rotation to rotate the picture then click OK.
o This can be repeated if the rotation is incorrect.
o Use the Crop Tool to trim the image by clicking on it and the clicking
and holding while dragging it across the area of the image to be cut
out.
o If the selected area is not suitable use the handles around the dashed
rectangle to adjust the size and when happy click the green tick.
© Mr Timothy John Tyne
Using Photoshop Elements 5.0 (An introduction)
Opening the application and files
Opening Photoshop
• Click on the Start button then select All apps/All Programs and click on
Adobe Photoshop Elements 5.0
• To edit pictures select Edit and Enhance Photos from the Photoshop start-up
welcome screen.
Opening a picture file
• Click on File on the menu bar then select and click on Open… Ctrl + O. Use
the Open screen to select the file you want to open by clicking to open the
folders it is in. Once found double click on the picture file to open it.
Digital editing workflow
Digital editing workflow is digital editing of a photograph to improve it. The order of
the steps is important since alterations made by one step should not be undone or
changed by a later step. Moving from general global alterations to more selective
specific changes is best.
Unedited picture
STAGE 1: CREATING A COPY
Step1 - Making a duplicate layer.
This is done so that the original photograph can be returned to should the adjustments
not work out. Also if the photograph is to be edited further to form a collage for
example there are things that cannot be done with the locked background layer.
Duplicating it frees it up so more can be done to the duplicated layer. The unaltered
background layer can be deleted at the end of the digital editing if you are happy with
the final result in the duplicated layer.
• Duplicating a layer
o Open the Layers workspace by selecting the Windows drop down menu
on the menu bar and clicking on Layers.
o The background (or any other) layer can be duplicated by selecting the
layer in the layers window (it will be highlighted in blue) and then
clicking on Layer on the menu bar and then clicking on Duplicate
layer… A dialogue box appears in which you can change the name of
the duplicated layer. Once you have done that click the OK button.
Any layer that is highlighted in blue will be affected by any
adjustments made. Layers not highlighted will not be affected.
• Turn off the visibility of the background layer
o The Background layer will now be below the new duplicate layer. It is
best to click on the eye in a box on the left in the Background layer so
it disappears. This turns off the visibility of the background layer.
© Mr Timothy John Tyne
, Photography Page 2 of 18
Most steps from this point on can be done automatically or manually. Where this is
the case both methods will be given.
• Undoing actions
o Both the manual and automatic adjustments could be tried for each
step.
o Selecting Edit in the menu bar and clicking on Undo Ctrl+Z will
undo the last action or selecting Revert will undo all the actions going
back to when the file was last saved.
• Saving a file
o To Save a file after a step is completed select File in the menu bar and
click on Save Ctrl+S to overwrite the present file or click on
Save As… Shift+Ctrl+S to save the file as a new file.
Note If the file is saved as a JPEG the background layer will be lost in
the JPEG file and the edited duplicate layer becomes the new
background layer.
STAGE 2: STRAIGHTENING AND PERSPECTIVE ADJUSTMENTS
Step 2 – Straightening the picture
• Automatic method
o Select Image on the menu bar and from the drop-down menu chose
Rotate ►and across to Straighten and Crop Image.
o Use the Crop Tool to trim the image by clicking on it and the clicking
and holding while dragging it across the area of the image to be cut
out.
o If the selected area is not suitable use the handles around the dashed
rectangle to adjust the size and when happy click the green tick.
• Manual method
o Switch on the grid as a guide by selecting View and click on Grid if
there is no tick next to it so that a tick appears and the Grid appears on
the image.
o Select Image on the menu bar and from the drop-down menu chose
Rotate ►and across to Custom.
o In the Rotate Canvas dialogue box enter an Angle and chose Left or
Right rotation to rotate the picture then click OK.
o This can be repeated if the rotation is incorrect.
o Use the Crop Tool to trim the image by clicking on it and the clicking
and holding while dragging it across the area of the image to be cut
out.
o If the selected area is not suitable use the handles around the dashed
rectangle to adjust the size and when happy click the green tick.
© Mr Timothy John Tyne