Tutorial 7: Classification (Part II)
Lecture and Tutorial Learning Goals:
After completing this week's lecture and tutorial work, you will be able to:
Describe what a test data set is and how it is used in classification.
Using R, evaluate classification accuracy using a test data set and appropriate metrics.
Using R, execute cross validation in R to choose the number of neighbours.
Identify when it is necessary to scale variables before classification and do this using R
In a dataset with > 2 attributes, perform k-nearest neighbour classification in R using the tidymodels package to predict the class of a test dataset.
Describe advantages and disadvantages of the k-nearest neighbour classification algorithm.
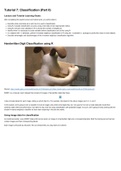
Handwritten Digit Classification using R
Source: https://media.giphy.com/media/UwrdbvJz1CNck/giphy.gif (https://media.giphy.com/media/UwrdbvJz1CNck/giphy.gif)
MNIST is a computer vision dataset that consists of images of handwritten digits like these:
It also includes labels for each image, telling us which digit it is. For example, the labels for the above images are 5, 0, 4, and 1.
In this tutorial, we’re going to train a classifier to look at images and predict what digits they are. Our goal isn’t to train a really elaborate model that
achieves state-of-the-art performance, but rather to dip a toe into using classification with pixelated images. As such, we’re going to keep working with the
simple K-nearest neighbour classifier we have been exploring in the last two weeks.
Using image data for classification
As mentioned earlier, every MNIST data point has two parts: an image of a handwritten digit and a corresponding label. Both the training set and test set
contain images and their corresponding labels.
Each image is 28 pixels by 28 pixels. We can interpret this as a big matrix of numbers:
,We can flatten this matrix into a vector of 28x28 = 784 numbers and give it a class label (here 1 for the number one). It doesn’t matter how we flatten the
array, as long as we’re consistent between images. From this perspective, the MNIST images are just a bunch of points in a 784-dimensional vector
space, with a very rich structure.
, We do this for every image of the digits we have, and we create a data table like the one shown below that we can use for classification. Note, like any
other classification problem that we have seen before, we need many observations for each class. This problem is also a bit different from the first
classification problem we have encountered (Wisonsin breast cancer data set), in that we have more than two classes (here we have 10 classes, one for
each digit from 0 to 9).
Lecture and Tutorial Learning Goals:
After completing this week's lecture and tutorial work, you will be able to:
Describe what a test data set is and how it is used in classification.
Using R, evaluate classification accuracy using a test data set and appropriate metrics.
Using R, execute cross validation in R to choose the number of neighbours.
Identify when it is necessary to scale variables before classification and do this using R
In a dataset with > 2 attributes, perform k-nearest neighbour classification in R using the tidymodels package to predict the class of a test dataset.
Describe advantages and disadvantages of the k-nearest neighbour classification algorithm.
Handwritten Digit Classification using R
Source: https://media.giphy.com/media/UwrdbvJz1CNck/giphy.gif (https://media.giphy.com/media/UwrdbvJz1CNck/giphy.gif)
MNIST is a computer vision dataset that consists of images of handwritten digits like these:
It also includes labels for each image, telling us which digit it is. For example, the labels for the above images are 5, 0, 4, and 1.
In this tutorial, we’re going to train a classifier to look at images and predict what digits they are. Our goal isn’t to train a really elaborate model that
achieves state-of-the-art performance, but rather to dip a toe into using classification with pixelated images. As such, we’re going to keep working with the
simple K-nearest neighbour classifier we have been exploring in the last two weeks.
Using image data for classification
As mentioned earlier, every MNIST data point has two parts: an image of a handwritten digit and a corresponding label. Both the training set and test set
contain images and their corresponding labels.
Each image is 28 pixels by 28 pixels. We can interpret this as a big matrix of numbers:
,We can flatten this matrix into a vector of 28x28 = 784 numbers and give it a class label (here 1 for the number one). It doesn’t matter how we flatten the
array, as long as we’re consistent between images. From this perspective, the MNIST images are just a bunch of points in a 784-dimensional vector
space, with a very rich structure.
, We do this for every image of the digits we have, and we create a data table like the one shown below that we can use for classification. Note, like any
other classification problem that we have seen before, we need many observations for each class. This problem is also a bit different from the first
classification problem we have encountered (Wisonsin breast cancer data set), in that we have more than two classes (here we have 10 classes, one for
each digit from 0 to 9).