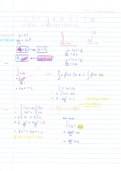
1. When making this we had to first make a plane (22, 5), from the menu and making it
a certain height and width
2. We then made the plane go to the points 0 on all axes but right clicking the little
menu bar at the bottom.
3. From there we added our material types, those being standard and a bitmap (which
is to insert an image)
4. Then we connected the bitmap to standard and the standard to the actual plane.
5. From there we then used the wine tool in order to create some lines around the
glass as a basic guide.
6. After that we then clicked on the ‘Vertex’ option and we could refine to make extra
points to then Bezier the points to round them off so that they smooth out a bit.
7. From there we then selected the top 2 points of the glass which we then ‘fillet’ and
dragged up till the 2 points meet to create a round off at the top. Then ‘weld’ those
together to make 1 point.
8. After sorting the points to the standard, you want, you then make the 2 inner points
to be 0 on the X axis.
9. Once that’s done, then go on Perspective view where you can then add an option
called ‘Lathe’ and choose ‘Min under align’ this creates a full wine glass.
10. To then finish it off add an option for ‘TurboSmooth’ this just makes it look more
smooth and perfects the edges a bit more.

