MAE 1351 EXAM #4 Questions and Answers Solved 100%
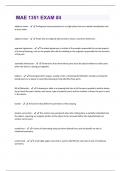
adjacent views - Orthogonal views presented on a single plane that are created immediately next to each other. adjacent views - Views that are aligned side by side to share a common dimension. approval signatures - The dated signatures or initials of the people responsible for certain aspects of a formal drawing, such as the people who did the drafting or the engineer responsible for the function of the part. assembly dimensions - Dimensions that show where parts must be placed relative to other parts when the device is being put together. balloon - Closed geometric shapes, usually circles, containing identification numbers and placed beside parts on a layout or assembly drawing to help identify those parts Bill of Materials - A drawing or table in a drawing that lists all of the parts needed to build a device by (at least) the part number, part name, type of material used, and the number of times the part is used in the device border - A thick line that define the perimeter of the drawing broken-out section - The section view produced when the cutting plane is partially imbedded into the object, requiring an irregular portion of the object to be removed before the hypothetically cut surface can be seen. centerlines - A series of alternating long and short dashed lines used to identify an axis of rotational symmetry centermark - A small right-angle cross that is used to identify the end view of axis of rotational symmetrycontinuation blocks - Header blocks used on the second and subsequent pages of multipage drawings cutting plane - A theoretical plane used to hypothetically cut and remove a portion of an object to reveal its interior details. cutting plane line - On an orthographic view of an object, the presentation of the edge view of a cutting plane used to hypothetically cut and remove a portion of that object for viewing cutting segment - On a stepped cutting plane for an offset section view, that portion of the plane that hypothetically cuts and reveals the interior detail of a feature of interest default tolerances - Usually appearing in the drawing header, the tolerances to be assumed for any dimension show on a part when that dimension does not specify any tolerances.

Geschreven voor
- Instelling
- MAE 1351
- Vak
- MAE 1351
Documentinformatie
- Geüpload op
- 25 juli 2024
- Aantal pagina's
- 7
- Geschreven in
- 2023/2024
- Type
- Tentamen (uitwerkingen)
- Bevat
- Vragen en antwoorden
Onderwerpen
-
mae 1351
Ook beschikbaar in voordeelbundel
