CIVIL 3D
SURFACE AANMAKEN
In de toolspace =>surface
Create surface
o TIN surface
o Enkel naam aanpassen (“bestaande toestand”)
o Style-trianges
Definition: point groups: add = > ground shots en roads en buildings =>apply
Kies de point groups die je wilt toevoegen
Grachten/wegen = Breaklines: add Ok=> selecteer + enter (hierdoor sluiten driehoek aan op breaklines)
Breakline vind je bij je gemaakte surface
Gebouwen = Boundaries: add => type: hide (driehoeken worden uit gebouw geknipt)
Aan de rand te grote driehoeken door gebrek aan informatie
o Selecteer terrein
o Edit surface
o Delete line delete points als je punten wilt weg doen om terrein aan te passen
o Lange lijnen => selecteren => enter
Stel punt klopt niet met werkelijkheid:
Verkeerde hoogte aanpassen =>
o Edit surface style => Display => point => aanvinken
o Selecteer terrein
o Edit surface => Modify point => punt selecteren => new elevation
o Edit surface style
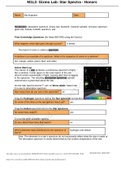
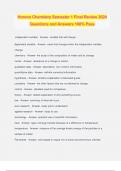
Style:
Via surface bestaande toestand => surface properties (dan kan je alles van uitzicht aanpassen)
Surface properties : contours 1 5
Of elevation banding
Onder analysis kan je slope aanpassen en zo verschillende kleuren per hoogte geven
Pijltje en dan aanpassen
surface style moet ook op slope banding staan voor weergave anders zie je niets
o als je voor slopes kiest
in wegenbouw: te druk => border only
1
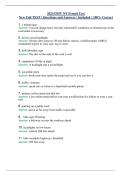
, WEGENIS ONTWERP (HORIZONTAAL TRACÉ)
Create alignment from object (zit gewoon onder home alignment)
Klink op de lijn en kies richting van de weg
Naam: naar keuze “hoofdweg”
Type: centerline kruispunten: curp return
Site: none
Alignement style => ontworpen toestand
o No labels
o Add curves uitvinken (we gaan dat zelf doen later)
o Erase existing entities aan laten staan
o Designe criteria : Design speed, 70km/u (eigen keuze vb autostrade 120)
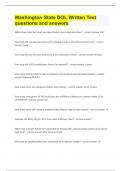
Lijn selecteren => Properties => style: proposed
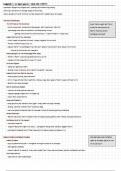
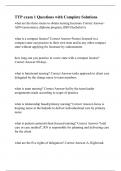
Geometry Editor => linkse icoon => curved and spiral setting
Clothoid (=overgangsboog)
spiral in 20m 30
curve 50m
spiral out 20m 30
Add free spiral curve spiral
De lijnen aanduiden van begin van rijrichting naar einde (in
het begin al aangeduid)
Less (more) than 180
Radius 50
Spiral in 20 out 20
Tangent tangent with curves: als je nu zelf tekent onthoud hij je instellingen en kan je vrij tekenen met de
juiste instellingen.
Verkeerd? => delete sub-entity
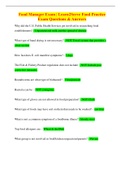
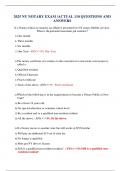
Labels toevoegen
o Selecteren van alignment => add labels => parallel with tick => add/ edit station
o Stel je wilt kilometrering per zoveel meter: style: parrallel with tick
o major stations staan normaal al aan
o geomitri points: add tanget-curve intersect en omgekeerd aanduiden
o add label => single segment => op segment klikken
2
SURFACE AANMAKEN
In de toolspace =>surface
Create surface
o TIN surface
o Enkel naam aanpassen (“bestaande toestand”)
o Style-trianges
Definition: point groups: add = > ground shots en roads en buildings =>apply
Kies de point groups die je wilt toevoegen
Grachten/wegen = Breaklines: add Ok=> selecteer + enter (hierdoor sluiten driehoek aan op breaklines)
Breakline vind je bij je gemaakte surface
Gebouwen = Boundaries: add => type: hide (driehoeken worden uit gebouw geknipt)
Aan de rand te grote driehoeken door gebrek aan informatie
o Selecteer terrein
o Edit surface
o Delete line delete points als je punten wilt weg doen om terrein aan te passen
o Lange lijnen => selecteren => enter
Stel punt klopt niet met werkelijkheid:
Verkeerde hoogte aanpassen =>
o Edit surface style => Display => point => aanvinken
o Selecteer terrein
o Edit surface => Modify point => punt selecteren => new elevation
o Edit surface style
Style:
Via surface bestaande toestand => surface properties (dan kan je alles van uitzicht aanpassen)
Surface properties : contours 1 5
Of elevation banding
Onder analysis kan je slope aanpassen en zo verschillende kleuren per hoogte geven
Pijltje en dan aanpassen
surface style moet ook op slope banding staan voor weergave anders zie je niets
o als je voor slopes kiest
in wegenbouw: te druk => border only
1
, WEGENIS ONTWERP (HORIZONTAAL TRACÉ)
Create alignment from object (zit gewoon onder home alignment)
Klink op de lijn en kies richting van de weg
Naam: naar keuze “hoofdweg”
Type: centerline kruispunten: curp return
Site: none
Alignement style => ontworpen toestand
o No labels
o Add curves uitvinken (we gaan dat zelf doen later)
o Erase existing entities aan laten staan
o Designe criteria : Design speed, 70km/u (eigen keuze vb autostrade 120)
Lijn selecteren => Properties => style: proposed
Geometry Editor => linkse icoon => curved and spiral setting
Clothoid (=overgangsboog)
spiral in 20m 30
curve 50m
spiral out 20m 30
Add free spiral curve spiral
De lijnen aanduiden van begin van rijrichting naar einde (in
het begin al aangeduid)
Less (more) than 180
Radius 50
Spiral in 20 out 20
Tangent tangent with curves: als je nu zelf tekent onthoud hij je instellingen en kan je vrij tekenen met de
juiste instellingen.
Verkeerd? => delete sub-entity
Labels toevoegen
o Selecteren van alignment => add labels => parallel with tick => add/ edit station
o Stel je wilt kilometrering per zoveel meter: style: parrallel with tick
o major stations staan normaal al aan
o geomitri points: add tanget-curve intersect en omgekeerd aanduiden
o add label => single segment => op segment klikken
2